An Introduction to Horse Clicker Training
 Have you ever watched one of those professional dog training shows? You might see trainers teaching their dog to do amazing tricks with incredible precision. Or maybe you’ve noticed a trainer working with dolphins.
In each case, these trainers often use a technique called “clicker training” to help signal their animals. Every time the animal did something well, the trainer makes the click noise and rewards them with some sort of tasty treat… fish, kibbles, you get the idea.
Well, this training method has made its way into the equine world too! In fact, it’s making quite the splash.
People are using equine clicker training to teach their horses to be more calm and respectful when being handled. Clicker training can also be a useful way to teach your horse to do fancier tricks like bowing, carrying balls, or even loading calmly onto the horse trailer!
In this article, we’re going to share some of the very first steps you’ll need to introduce your horse to clicker training. Then, in Part 2 of this article, we’ll look at some more advanced techniques that will help you load your horse onto the trailer with ease.
5 Steps to Teach Your Horse Ground Manners with Clicker Training
If you’ve ever tried to lead an anxious horse out to the pasture, you understand the difference between good ground manners and a horse that just wants to drag you along.
A horse with polite ground manners is much safer and enjoyable to be around. Plus, mutual respect and communication between horse and handler on the ground translates to a better partnership in the saddle.
These first five steps will help you start to build a positive relationship with your horse while standing by his side. Start slow and don’t rush the process. It all starts with building a casual connection…
Step 1: Start with some casual connection time.
Horse trainer Hannah Weston of Connection Training broke down the first steps she uses to introduce clicker training to horses in her series of videos.
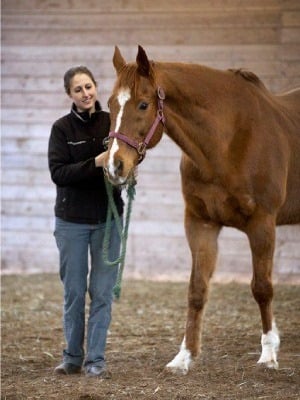
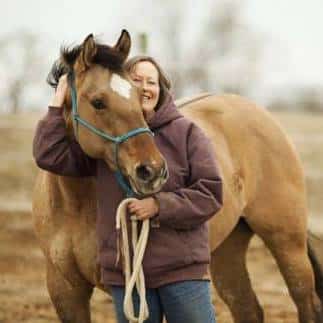
To start, just spend time with your horse. Go into the ring with them and find their favorite itchy spot on the back of their rump. Groom them, or take them for a walk in hand. If your animals is too anxious, then you could even stand on the other side of fence and softly talk to them or reach over to give them some head rubs.
The purpose here is to just spend time creating a casual connection with your horse. You are teaching them that it’s not all about the food rewards or “doing stuff.” It’s okay to just be together and relaxed.
 This will help your horse avoid one of the most common problems with clicker training. Horses that don’t learn to just be relaxed and casual around you tend to be overly focused on the food rewards. They may become “mouthy” and tense every time you work with them. They are constantly thinking about what “trick” they need to do so they can get a reward.
Instead, use this casual connection time to teach your horse to be relaxed and calm around you.
Step 2: Introduce the marker signal.
Once your horse is relaxed around you, slowly start introducing the marker signal (or the clicker). This marks the moments when your horse is doing something you like. It’s a clear way to say “yes” to your horse and it may be a click sound (with a mechanical clicker) or a specific word from you.
Often, people worry that they would need to carry a clicker with them all the time. This can be avoided by simply clucking softly with your tongue. While you’re with your horse, begin pairing the marker signal click with something your horse likes. This might simply be scratches or food.
You want your horse to associate feeling calm and relaxed with the marker signal. So, introduce the click in a very low-key way. Keep your energy down and focus on a soft connection with your horse.
Step 3: Introducing food as a reward
Neck scratches are great, but they might not be strong enough motivation for a lot of horses. That’s why we start using food. Food is a primary motivator. This simply means that it’s needed for survival, so horses are very happy to do positive behaviors when some tasty treats are their reward.
The downside for using food is that it tends to excite horses and make them tense. It’s common for horses to get too pushy or mouthy when food is used as a reward. So, your goal here is to keep things very calm.
Use low-value food in a bucket to start. Leave their favorite apples, carrots and grain for later when you need stronger motivation. For now, you’re just calmly giving your horse a little food -- like bits of hay -- in a bucket and pairing that with the click sound.
This will help them stay calm and learn that they can just “be” rather than always feeling like they need to “do.”
Step 4: Teach them to stand quietly
 One of the first skills you’ll teach your horse using clicker training is to simply stand quietly with you. You’ll want your horse to stand beside you without distracted by other things. Again, it should be a calm connection where your horse is beside you but not overly focused on your food rewards or acting pushy.
Start by standing on just one side and reward your horse for positive behaviors when their attention is still on you. For instance, if they are searching your pockets for treats and then move their head away from you, that moment when they are away from you would be a good time to click and give them a reward.
That way you are teaching your horse they will be rewarded when their head is away and they are standing quietly with their attention on you. Look for moments when your horse is focused and with you -- but not pushing.
One thing to mention here… if you make the click sound, your horse might wheel his head around looking for the food reward. In this case, don’t give the food right away. Instead, have them wait until their head is back in the forward position and offer them the food there. It teaches them that they will receive the food when they are in a certain position and teaches them to wait patiently.
Work on both side of your horse so they can stand quietly no matter where you are positioned. You can also purposely rummage around in your treat pouch so they become desensitized to the sound and learn they still need to wait patiently and do the correct behaviors to be rewarded.
Step 5: Walk together
This next skill actually goes hand-in-hand with standing quietly. In fact, you may want to work on both of these skills at the same time. That way, your horse won’t get too bored from standing in the same place for long periods of time.
Walking together is all about having your horse stay connected to you during movement. You also want to maintain the relaxation that you established earlier with the training. This is an important foundation skill that leads to things like leading, lunging, and even elements of riding.
Moving together helps you build your bond, your connection, and your communication. The movement also keeps your horse from getting too tense with lots of standing. So, you might work on standing quietly, then ask your horse to walk forward with you (without any lead lines) and then work on standing quietly again.
When you invite your horse to walk up a few steps to join you, they will naturally stand in the same position where they were standing quietly before. They know that this is the position where they have been rewarded in the past. It teaches your horse to walk respectfully beside you rather than being pushing or trying to walk too fast.
To keep your horse relaxed, think about your own body’s energy. Keep your voice calm and your breathing steady. Slow the pace of your own walking steps so that it matches your horses. These things will all help your horse stay relaxed so you can reward them for positive behaviors.
Eventually, you’ll want to try using these same techniques with your hose in a halter with a lead line. You can practice reinforcing the correct behaviors both inside and outside of the enclosed ring.
Closing thoughts
Hopefully, these steps have helped you start to build a calm and respectful relationship with your horse. To see some of these techniques demonstrated, visit Connection Training on YouTube.
There, you’ll see a click training expert working with three rescue horses through each of these steps. Check out Part 2 of this article where we talk about targeting and loading onto a horse trailer using clicker training!